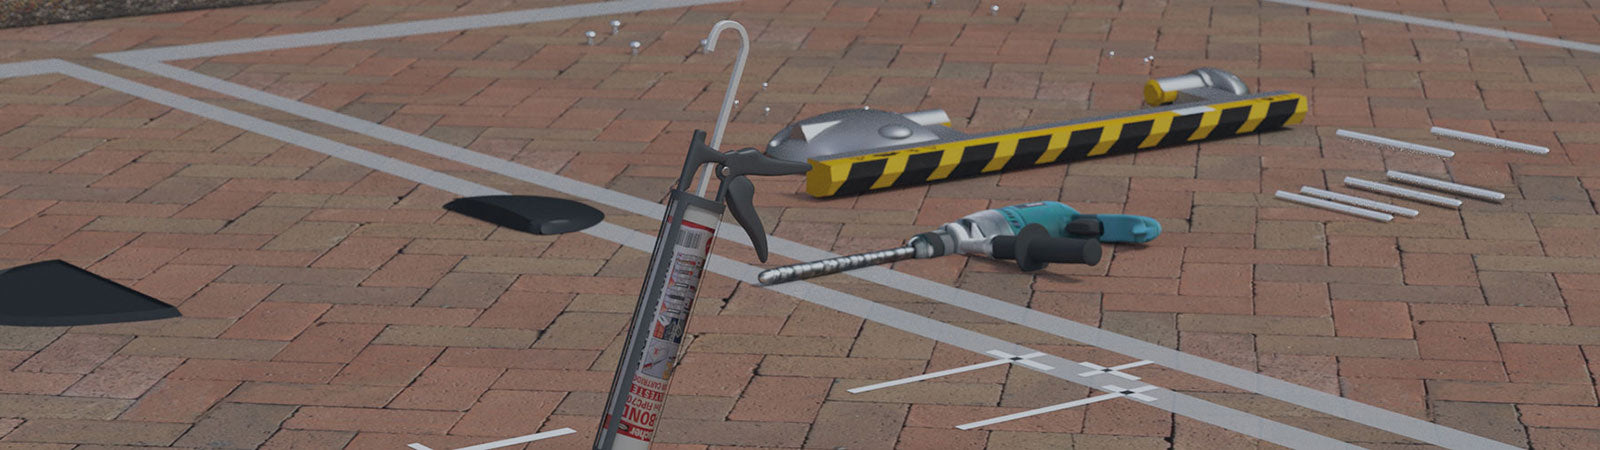
DIY INSTALLATION INSTRUCTION GUIDES

If you plan on installing your bollard(s) or barrier(s) yourself or plan on using a contractor to carry this out on your behalf, take a moment to understand the process so you have a clear idea as to what is involved.

This will ensure the guarantee and performance of your product(s) is not compromised, as the correct installation of your bollard, post or barrier is critical and is something that should not be overlooked. The following guidelines will hopefully help, but if you are in any doubt then please feel free to give us a call or drop us a line and we'll be happy to help.

Positioning, Spacing & Drive Through Gaps

There are no set recommendations to determine the correct placement, spacing and alignment of bollards.

Applying the correct spacing between each bollard or from a boundary wall or pillar, will vary from project to project.

The industry has created some guidelines for the optimal placement and spacing of bollards to ensure the level of security and safety you are looking for is not compromised.

Every project is different, we advise that you follow our guidelines, and consider the drive through gap for your application.

Just apply basic common sense to decide what the actual drive through gap should be.

Freedom of movement for pedestrians will also need to play a part in how you plan your project.

To ensure the vehicles on your driveway are protected, you need to plan for a 1.3 to 1.5 mtr drive through gap between each bollard, boundary wall or fence post.

We recommend positioning your parking post centrally, and at least 3 feet away from the front of your parking space. This will prevent any accidental damage to your parking post by passing traffic and other users of the car park.

To ensure access control is applied on a private road, you need to plan for a 1.3 mtr drive through gap between each bollard, boundary wall or fence post.

To ensure pedestrians are protected on a public footpath, you should plan for a 1.2 mtr drive through gap between each bollard.

To ensure your building is protected against an attempted ram raid attack, you need to plan for a 1.2 to 1.3 mtr drive through gap between each bollard or boundary.

To ensure, the level of security is not compromised, you need to plan for a 1.2 to 1.3 mtr drive through gap between each bollard, boundary wall or pillar.

Telescopic Bollards Installation

  1. Check for utilities and perform a visual inspection for any obvious obstructions.
  2. Scan for live cables and any underground services with a cable avoidance scanner, and mark out the area to be excavated.
  3. Excavate a bore hole to approx 300mm x 300mm square.
  4. Excavate down to the full depth of your bollard and allow for an additional 20mm stone base depth of 200mm for drainage.
  5. Lower the bollard casing into the bore hole and ensure the top of the casing is flush to the surface level.  
  6. Raise the inner bollard into the upright position, and check to ensure the bollard is level to all plains when raised.
  7. When level, slowly back-fill 20mm stone around the casing, and leave the top 400mm clear for the concrete.
  8. Lower the bollard back into the outer casing and raise it up again to check for it’s smooth operation.
  9. Back-fill the final 400mm with a good concrete mix to a medium wet slump.
  10. Before the concrete has set, lower and raise the inner bollard to double check that it is still vertical to all planes.
  11. Lower the inner bollard back into the outer casing and begin to reinstate your existing surface.

Please note: Due to the extra weight of these type of bollards,this will be a 2 person job.

  1. Check for utilities and perform a visual inspection for any obvious obstructions.
  2. Scan for live cables and any underground services with a cable avoidance scanner, and mark out the area to be excavated.
  3. Excavate a bore hole to approx 400mm x 400mm square.
  4. Excavate down to the full depth of your bollard and allow for an additional 20mm stone base depth of 200mm for drainage.
  5. Lower the bollard casing into the bore hole and ensure the top of the casing is flush to the surface level.  
  6. Raise the inner bollard into the upright position, and check to ensure the bollard is level to all plains when raised.
  7. When level, slowly back-fill 20mm stone around the casing, and leave the top 500mm clear for the concrete.
  8. Lower the bollard back into the outer casing and raise it up again to check for it’s smooth operation.
  9. Back-fill the final 500mm with a good concrete mix to a medium wet slump.
  10. Before the concrete has set, lower and raise the inner bollard to double check that it is still vertical to all planes.
  11. Lower the inner bollard back into the outer casing and begin to reinstate your existing surface.

Please Note: Consider the following points:

  • Do not install the bollard into ground that is below the water table or ground that is liable to flooding.
  • Do not install the bollard into ground that is sandy as this may affect the performance of your bollard.
  • If you are in any doubt then please give us a call as a lift assisted bollard needs to be installed into a clean bore.
  1. Check for utilities and perform a visual inspection for any obvious obstructions.
  2. Scan for live cables and any underground services with a cable avoidance scanner, and mark out the area to be excavated.
  3. Excavate a bore hole to approx 400mm x 400mm square.
  4. Excavate down to the full depth of your bollard and allow for an additional 20mm stone base depth of 200mm for drainage.
  5. Lower the bollard casing into the bore hole and ensure the top of the casing is flush to the surface level.  
  6. Raise the inner bollard into the upright position, and check to ensure the bollard is level to all plains when raised.
  7. When level, slowly back-fill 20mm stone around the casing, and leave the top 500mm clear for the concrete.
  8. Lower the bollard back into the outer casing and raise it up again to check for it’s smooth operation.
  9. Back-fill the final 500mm with a good concrete mix to a medium wet slump.
  10. Before the concrete has set, lower and raise the inner bollard to double check that it is still vertical to all planes.
  11. Lower the inner bollard back into the outer casing and begin to reinstate your existing surface.

Please Note: Consider the following points:

Do not install the bollard into ground that is below the water table or ground that is liable to flooding.

Do not install the bollard into ground that is sandy as this may affect the performance of your bollard.

If you are in any doubt then please give us a call as a lift assisted bollard needs to be installed into a clean bore.

  1. Check for utilities and perform a visual inspection for any obvious obstructions.
  2. Scan for live cables and any underground services with a cable avoidance scanner, and mark out the area to be excavated.
  3. Excavate a bore hole to approx 400mm x 400mm square.
  4. Excavate down to the full depth of your bollard and allow for an additional 20mm stone base depth of 200mm for drainage.
  5. Lower the bollard casing into the bore hole and ensure the top of the casing is flush to the surface level.  
  6. Raise the inner bollard into the upright position, and check to ensure the bollard is level to all plains when raised.
  7. When level, slowly back-fill 20mm stone around the casing, and leave the top 500mm clear for the concrete.
  8. Lower the bollard back into the outer casing and raise it up again to check for it’s smooth operation.
  9. Back-fill the final 500mm with a good concrete mix to a medium wet slump.
  10. Before the concrete has set, lower and raise the inner bollard to double check that it is still vertical to all planes.
  11. Lower the inner bollard back into the outer casing and begin to reinstate your existing surface.

Automatic Bollards Installation

Please note: Consider the following points:

Due to the weight of these type of bollards,this will be a 2 person job as you may need to excavate down to a depth of 1.5 mtrs.

Do not install the bollard into ground that is below the water table or ground that is liable to flooding.

If you are in any doubt then please give us a call as an automatic bollard needs to be installed into a clean dry bore.

  1. Check for utilities and perform a visual inspection for any obvious obstructions.
  2. Scan for live cables and any underground services with a cable avoidance scanner, and mark out the area to be excavated.
  3. Excavate a bore hole to approx 500mm x 500mm square.
  4. Excavate down to the full depth of your bollard and allow for an additional 20mm stone base depth of 200mm for drainage.
  5. Lower the bollard casing into the bore hole and ensure the top of the casing is flush to the surface level.  
  6. Check that the top plate is level to all planes.
  7. When level, slowly back-fill dry sharp sand around the casing, and leave the top 500mm clear for the concrete. This will help with drainage.
  8. Back-fill the final 500mm with a good concrete mix to a medium wet slump.
  9. Before the concrete has set, power up the system and test the bollards to ensure they are vertical.
  10. Reinstate the surface.

Yes, we recommend you consider this if you have a very high water table, as deep water standing within the bore that does not drain away over time may cause electrical problems further down the road.

If in any doubt, plese feel free to either give us a call or drop us aline.

A simple way to check, is to dig a hole approx 12-18 inches in diameter down to a depth of approx 36 inches, and then wait 20 minutes to see if water has entered the hole and risen to a high level. You will then know the level of the water table.

Yes, all of the BFT automatic bollards within our range are pre-wired with approx 10 lin mtrs of cable.

These cables need to run back to where you want to mount the control panel.

The control panel is the brains for the system, and will allow you to operate and control up to 4 automatic bollards on the same system.

You can expect to have 9-10 lin mtrs of cable pre-attached to each of your automatic bollards. These cables then need to terminate at the location of where you plan to postion and mount the control panel.

Yes, you can extend the wires, but you must ensure you use the correct grade and size of cable, and consider the possibility of any potential power drop that may affect the operation of your bollards.

We recommend cable extensions are carried out within a waterproof enclosure that is mounted above ground to ensure it is accessible in the future.

If you are in any doubt, please feel free to either give us a call or drop us an email.

You should have a signal strength of approx 20 lin mtrs from the control panel to your remote controls.

Please Note: Automatic bollards require specialised installation by a qualified electrician.

These instructions simply provide an overview of what is involved when installing an automatic bollard system.

  1. The pre-attached cables on each bollard will need to be run through some flexible trunking to protect the cables.
  2. We suggest you use 25mm-30mm flexible trunking for a single bollard.
  3. The trunking should then be buried out of sight beneath the surface.
  4. If you need to extend any of the cables, you can use a surface mounted weatherproof Wiska box to make the extensions.
  5. The cables from each bollard are then connected into the control panel.

Please Note: Automatic bollards require specialised installation by a qualified electrician.

These instructions simply provide an overview of what is involved when installing an automatic bollard system.

  1. Mount the control panel close to a power supply.
  2. The control panel will need it's own RCD protected power supply.
  3. The power supply required will depend on the type and quantity of bollards you plan to install.
  4. Connect the power supply into the control panel, but do not turn the power on before you connected the wires from the bollard(s) into the control panel.
  5. Connect the wires into the control panel, and turn the power on.
  6. You will now need to program the control panel for the type of bollard(s) you have installed.
  7. Finally program all of the remote controls to operate the bollard(s)

Bolt Down Parking Post Installation

  • Position the post, and mark on the surface where the ground anchor studs need to go.
  • Make sure you are using the correct size ground anchor studs and nuts for your post.
  • Make sure you have the correct size drill bit for the ground anchor studs you will using.
  • Drill down into the surface to the depth of the ground anchor studs.
  • Clean out the drilled hole to make sure it is free of dust and dirt etc.
  • Inject chemical anchor resin into the holes and then push the ground anchor studs down into the holes until you have enough stud above ground to be able to mount the post.
  • Mount the post over the ground anchor studs and place the nuts on the threads of the studs, and loosely wind the nuts down a few turns.
  • Make sure you allow enough thread on the studs to be able to tighten the nuts.
  • Once the resin has fully cured, tighten the nuts down onto the ground anchor studs.
  • Your post is now ready to use.

Lift-Out Bollards Installation

Please Note: Follow the instructions for the standard telescopic bollards and consider the following points:

  1. Place a layer of clean loose 20mm stone, 100mm deep into the bottom of the hole to allow for drainage.
  2. Ensure the ground socket is vertical and level to all planes.
  3. Check the socket and ensure no material or concrete has entered inside the bollards ground socket.
  4. Position the bollard into the ground socket and check that the bollard is vertical to all planes.
  5. Remove and replace the bollard into its socket to check that no obstruction has occurred during back-fill.

Fixed Bollards Installation

Please Note: Follow the instructions for the standard telescopic bollards and consider the following point:

1: Stand the bollard on a solid concrete or firm foundation and then use a medium slump mix to back-fill around the bollard. This will give the bollard a strong foundation and prevent it from sinking further into the ground.

Installation Videos

A collection of videos to demonstrate the installation process for all types of bollards...

Watch Videos
Drill and resin gun used to install a bolt down parking post

Need Help?

Drop us a line, or give us a call 📞 0333 444 8223

Get in Touch